
The only solutions available online were to return the diaper pail for a replacement. Unfortunately, this pail was a hand-me-down so I couldn't send it in. After studying the pail, I made a simple fix that gets rid of the grinding noise. It turns the pail into a regular lidded trashcan. There is now no bag-twist-seal feature, but otherwise functions well.
Here's a video of it after the fix. There's no grinding noise!
What you'll need:
- 2 flathead screwdrivers
- 1 Phillips screwdriver
Steps:
| # | Description | Photo |
|---|---|---|
| 1 | Remove bag and start with an empty pail | |
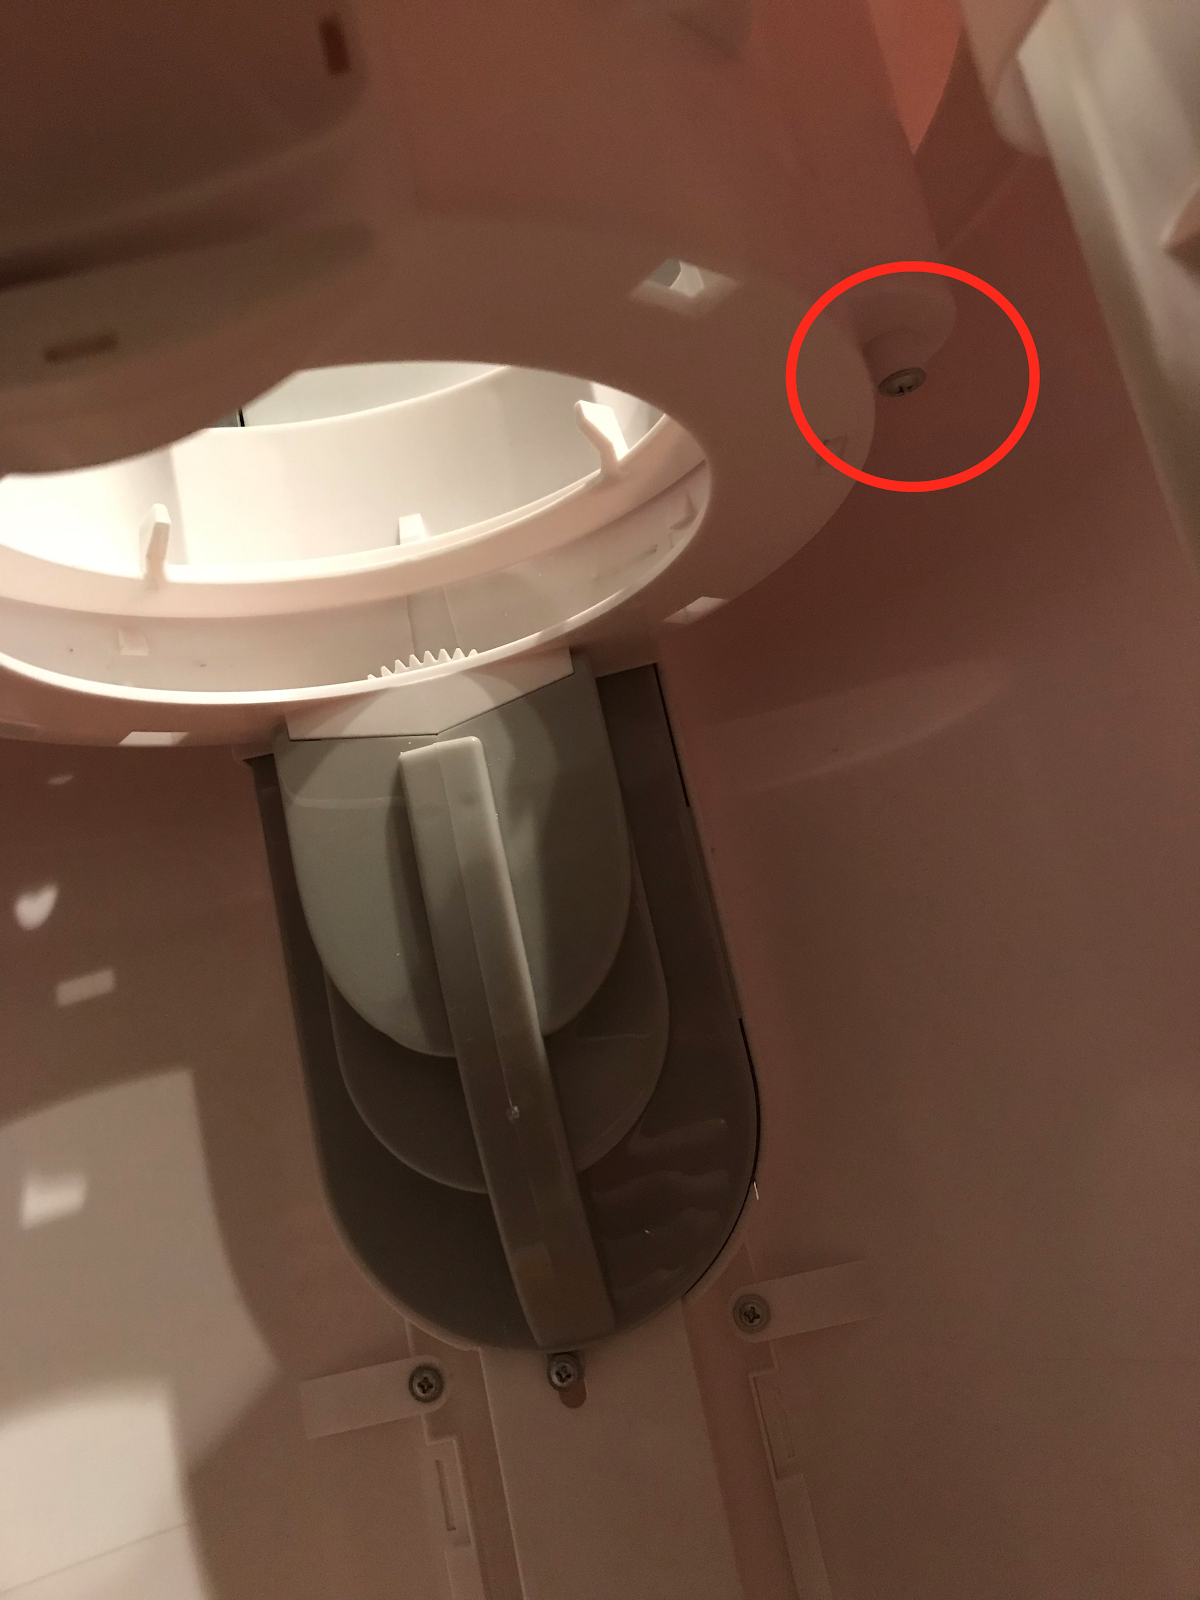
| 2 | Remove the screw on the underside of this area. It holds 3 pieces together (white ring, orange ring, and white base). Use the Philips screwdriver | 
 |
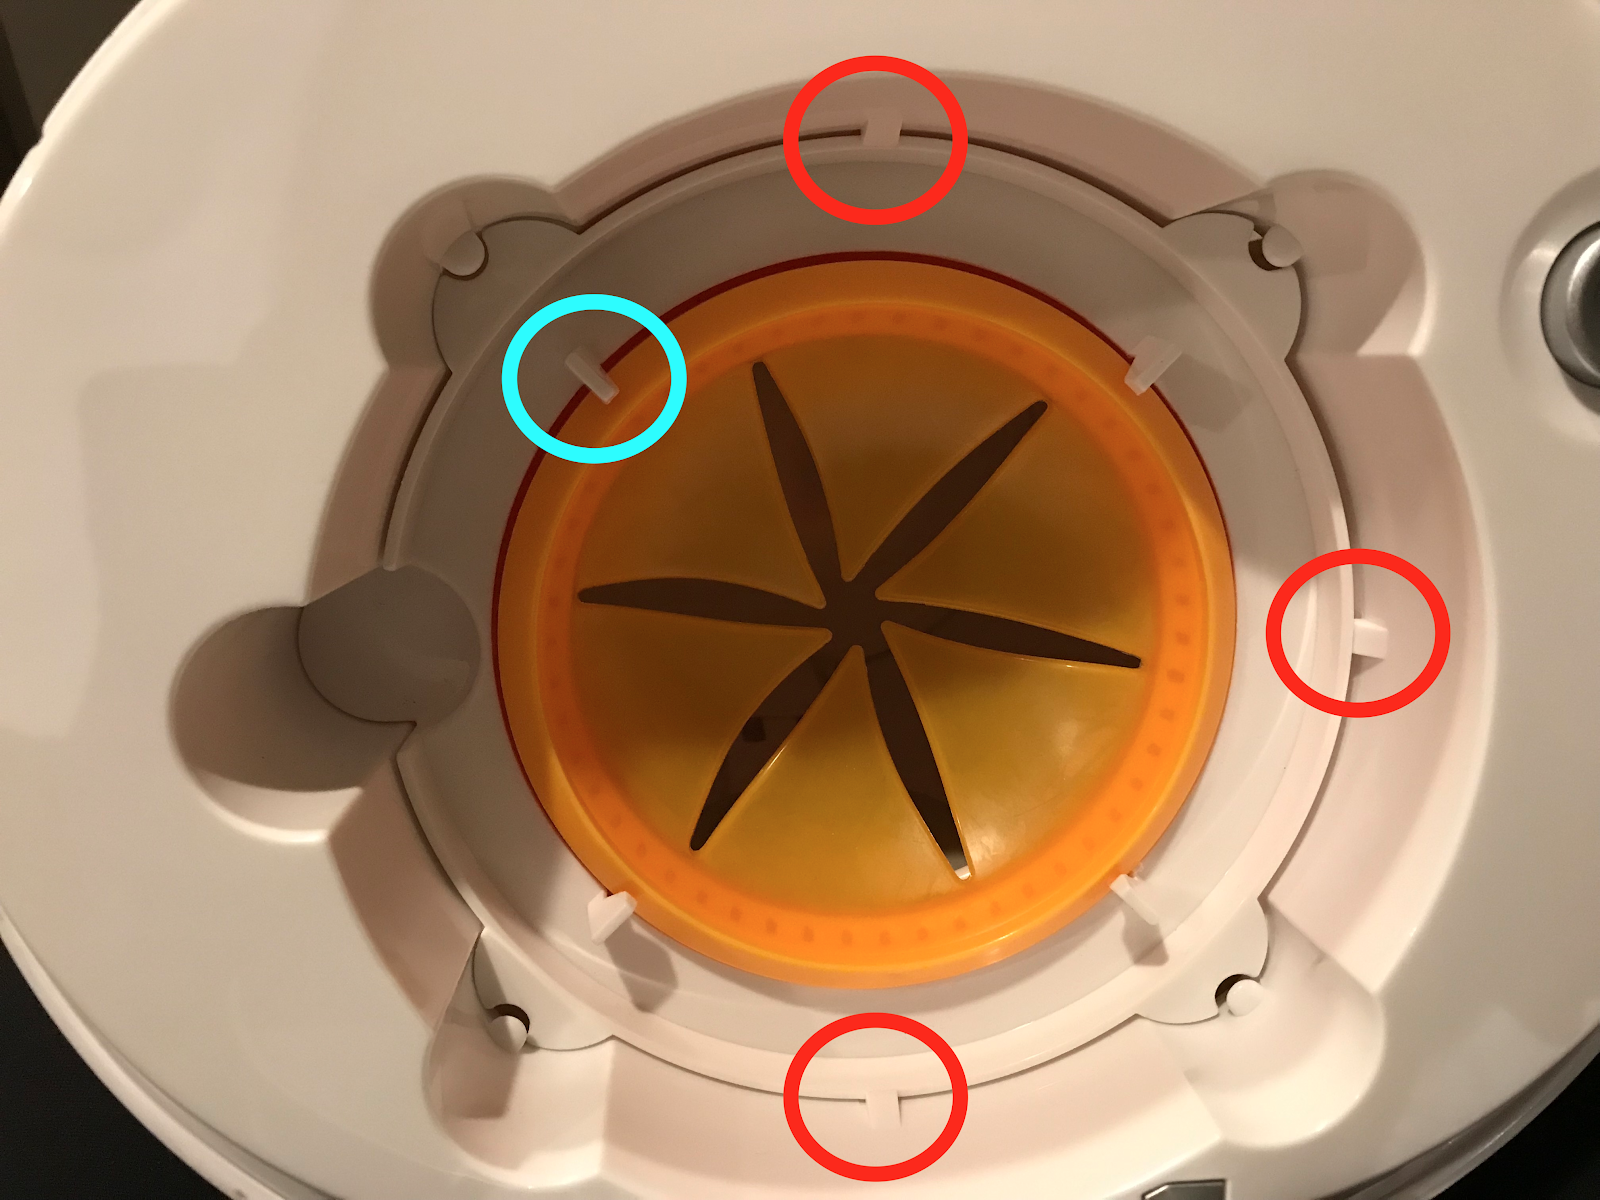
| 3 | Remove the top white ring. The white ring is held in place by 3 tabs, circled in red. Use a flathead screwdriver to release the ring from under the tabs and lift the ring up. Use the hooks, circled in blue, to help with the lifting.
I released the ring from all 3 tabs and then pulled the white ring out. It might be a snug fit when pulling the ring out. |
 |
| 4 | This is what the white ring looks like |  |
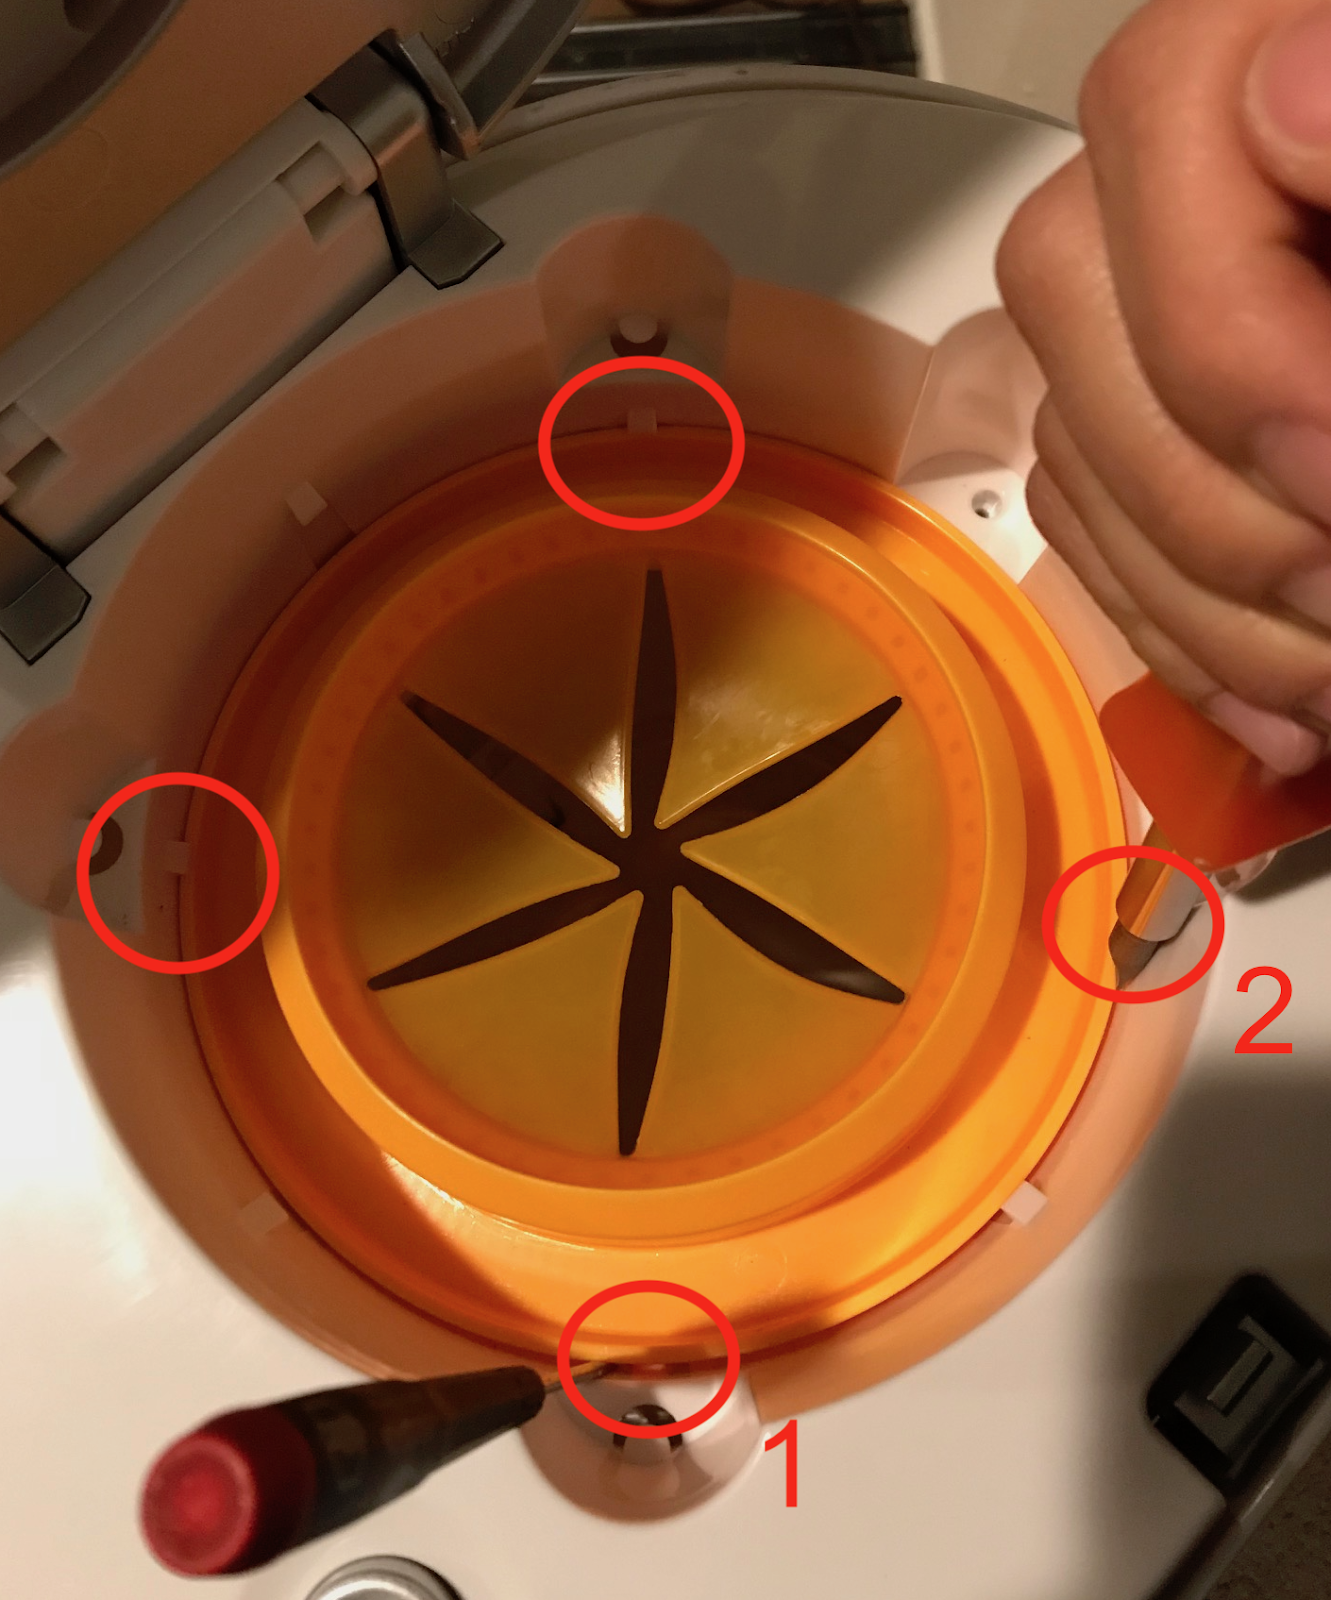
| 5 | Now remove the orange ring. This one is much more tricky. There are 4 tabs. I focused on just releasing the ring from 2 tabs and then pulling the ring out at a slant.
I used the black flat head screwdriver to open up the gap next to Tab #1. I did not release the ring at this tab just yet and just used the screwdriver as a placeholder. This is necessary because when you release Tab #2, the entire orange ring shifts over, reducing the gap near Tab #1. After releasing the ring from Tab #2, I kept the orange screwdriver next to Tab #2 and used the black screwdriver to release the ring from Tab #1. Now that the ring is released from both Tab #1 and #2, I pulled the orange ring up on that side and was able to wiggle the orange ring out. I nicked the white housing a bit with my screwdrivers. This part was tricky. |
 |
| 6 | This is what the orange ring looks like | 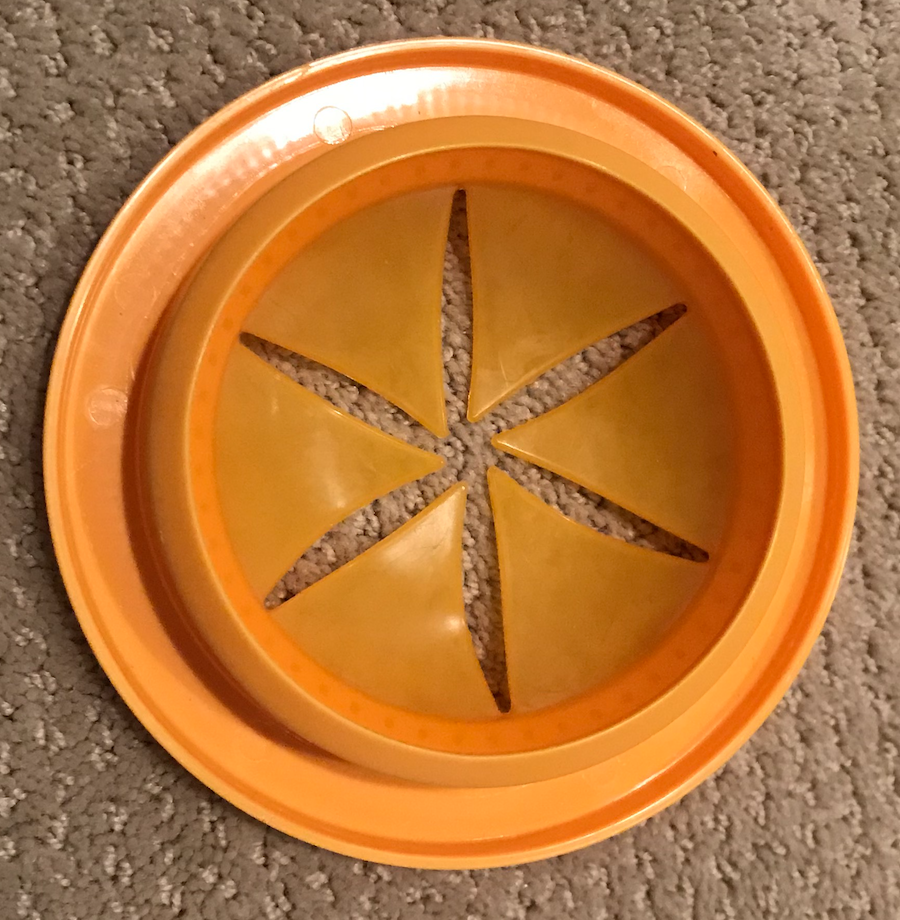 |
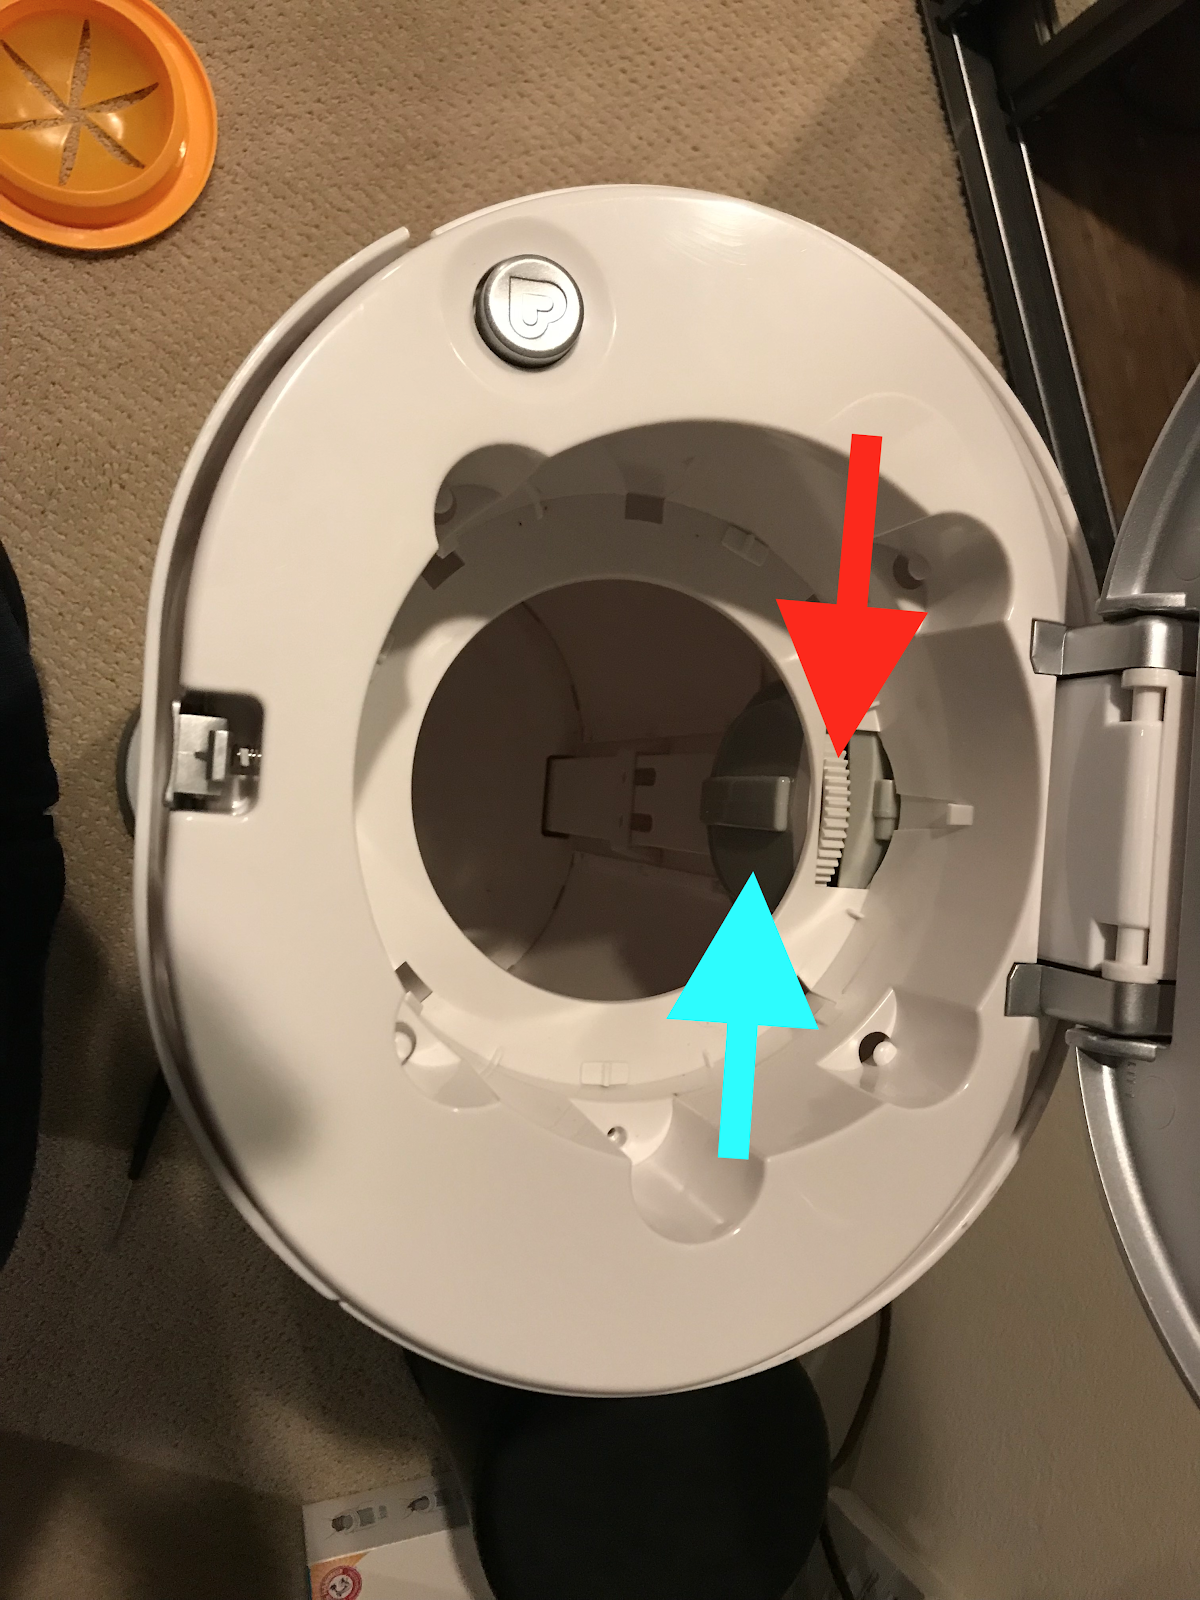
| 7 | Here’s a view from the top without the white or orange ring.
The red arrow points at the gear that catches the gears on the underside of the orange ring. This is the mechanism that does the bag twist. The blue arrow points at the gearbox that houses additional gears. Some gear in here is slipping which causes the awful grinding sound. I couldn’t figure out how to access this grey gearbox without completely disassembling the pail. |
 |
| 8 | Place the white ring back in place. Make sure to fit it under the 3 tabs |  |
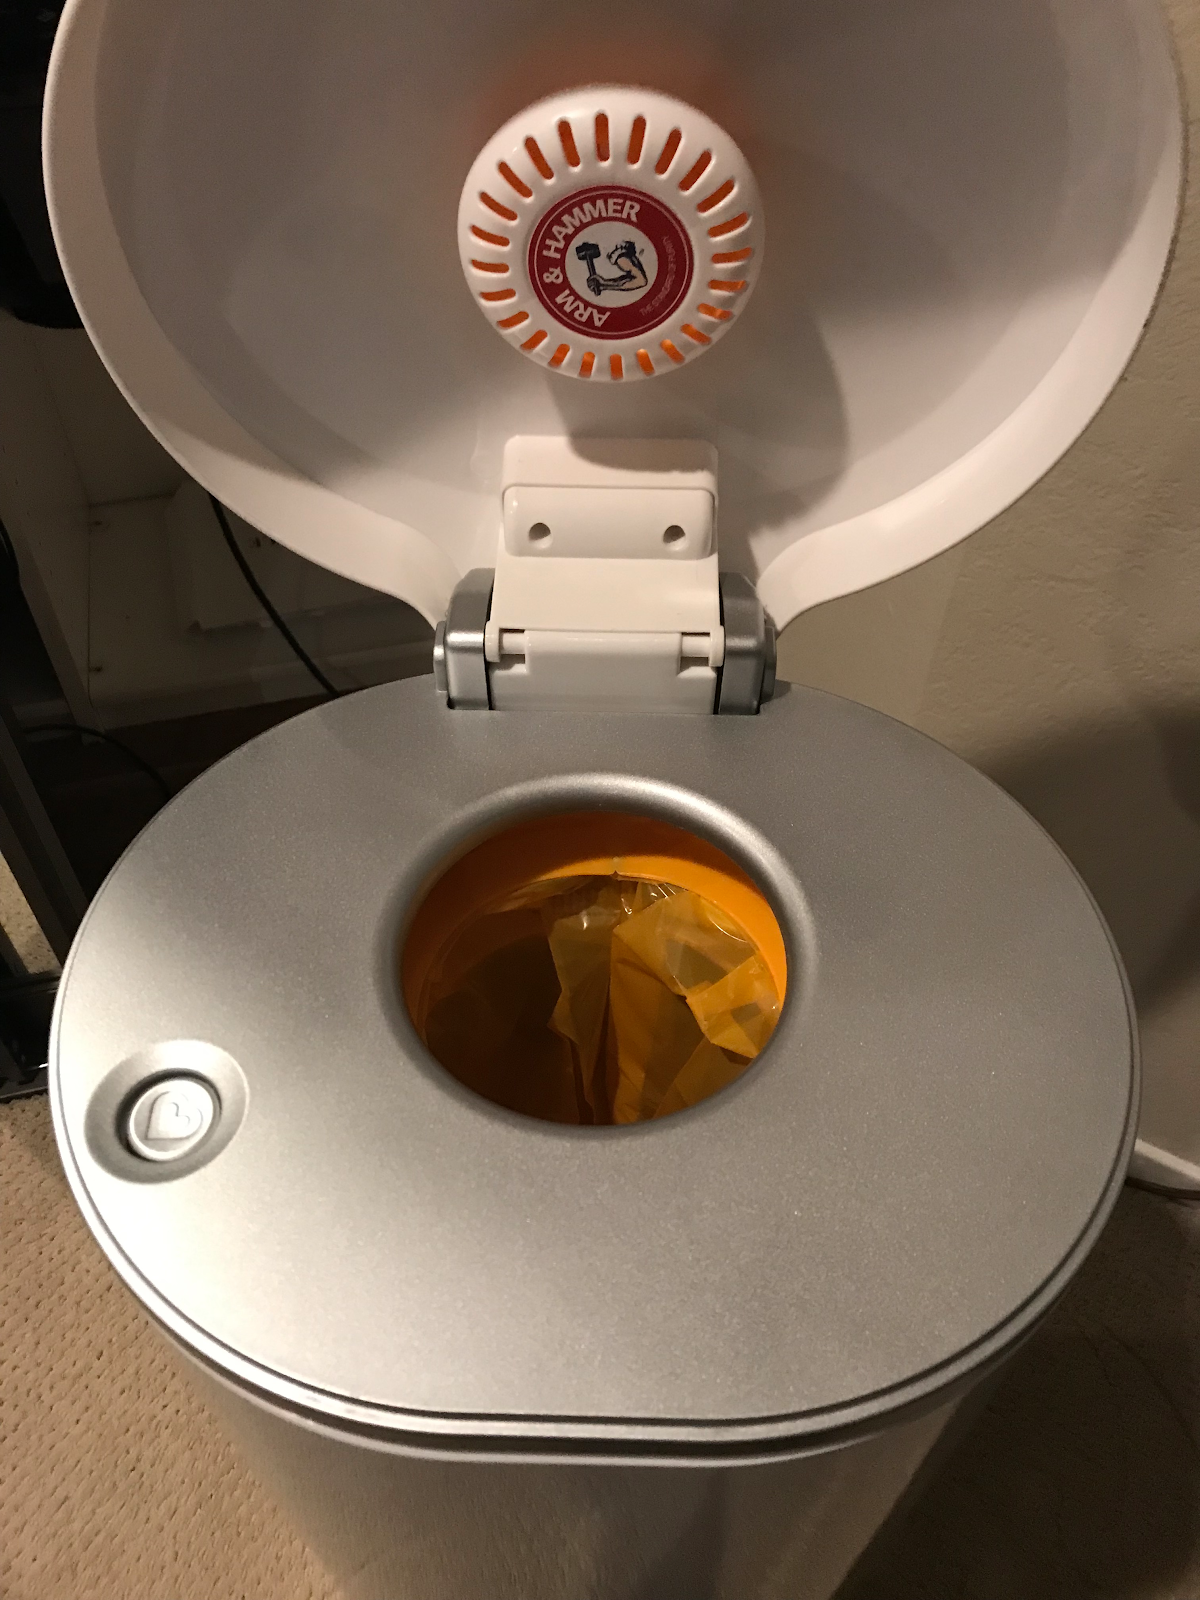
| 9 | Insert diaper refill bag and use as expected.
Close the lid and ta-da! No noise! |
 |
| 10 | Since the diaper bag isn’t twist-sealed anymore, we were worried the odor would be pretty bad. However, we’ve been using it for a few days and we haven’t been able to smell anything.
There you go! This is one way to fix that awful grinding noise and salvage a good trash can. |
 |


